29 de July de 2024
A Beginner’s Guide to Using YOUR Vitruve System!
Hey guys! Back with you this week to bring more knowledge on velocity based training (VBT) and how YOU can utilize it in YOUR training!
The last couple of times I have written for you, I discussed the application of VBT in training, breaking down what it means and how you can start to understand it and utilize it. As great as that is (and we will do more of it), let’s face it. You are on this site because you have heard about Vitruve and either already do OR would like to utilize it in your training and programming. So, today’s blog will give you a full rundown of how to set up your Vitruve encoder physically AND best utilize the Vitruve “teams application,” to record and utilize collected data.

Building a Profile on the Vitruve Teams App
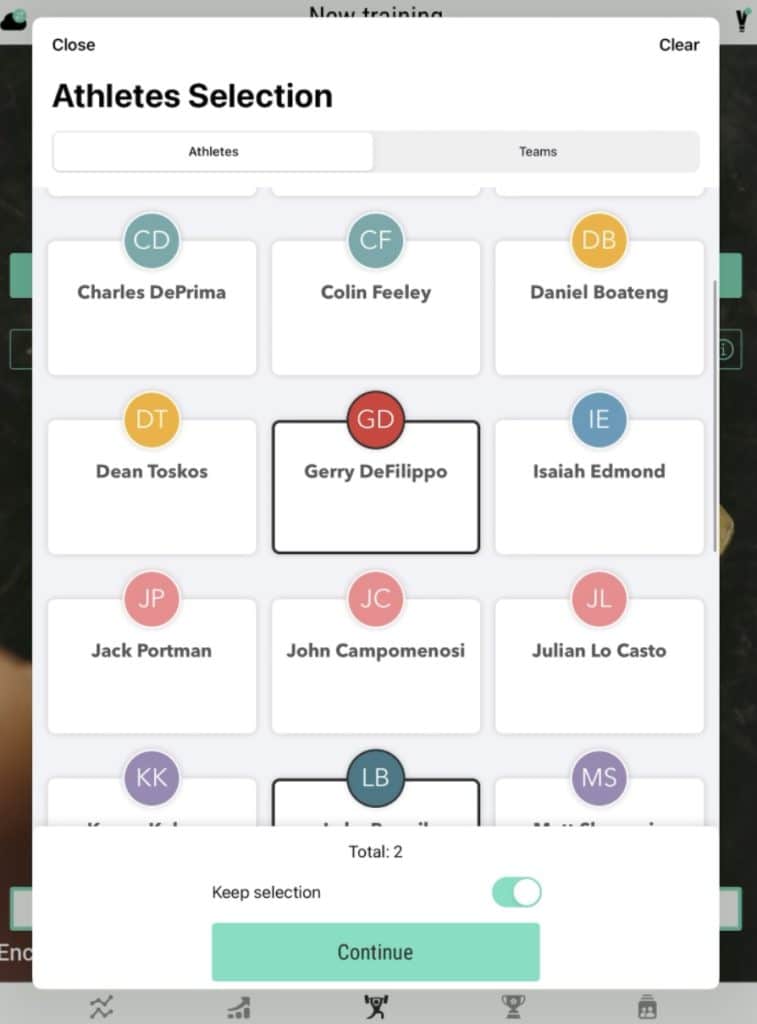
So you have your Vitruve encoder and your team’s application and are ready to go! Your first step should be building a profile for an individual athlete that can be used for that athlete’s training.
Here is an example of me building a profile for myself to use when I train!

Once you have your profile built, you can access this profile anytime you train within the teams app. It is critical that you set up a profile for every individual athlete who plans on using the app so they can accurately store their training information when they train. Yes, you can easily have multiple athletes use the app at one time! They will just switch between their profiles when it is their turn!
Once you have this done, it is time to set up your encoder!
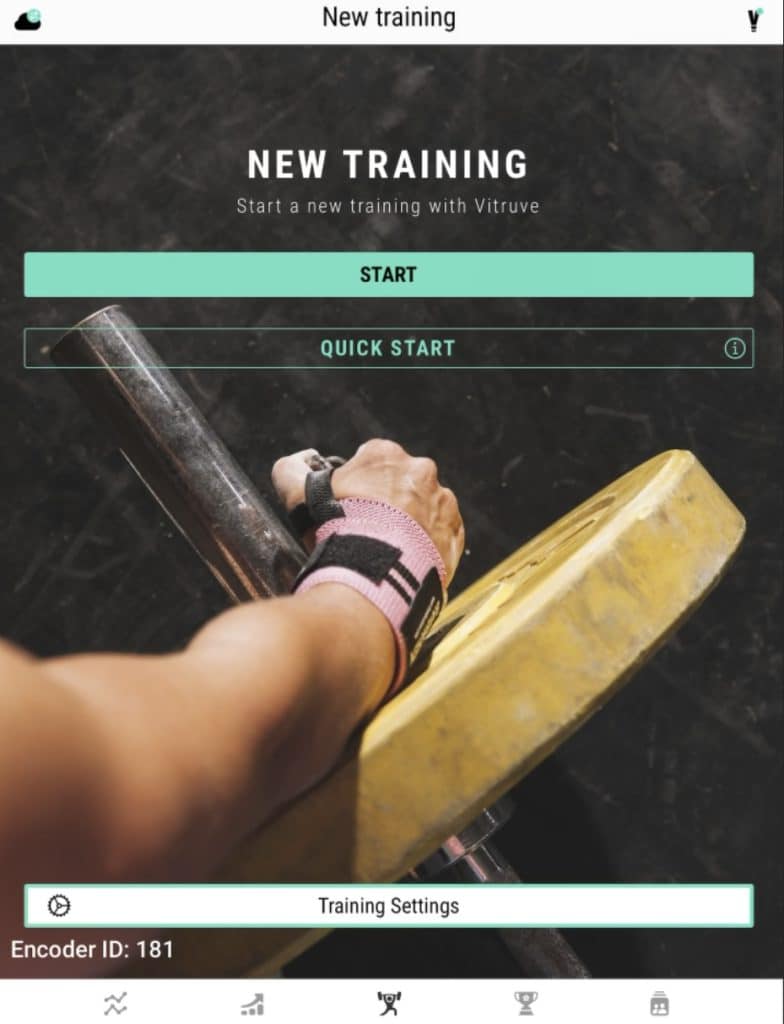
Setting up your Vitruve Encoder
You want to make sure that you set up your physical encoder properly so the data you collect in your training is as accurate as possible.
First and foremost, you would attach your Vitruve strap to your encoder!
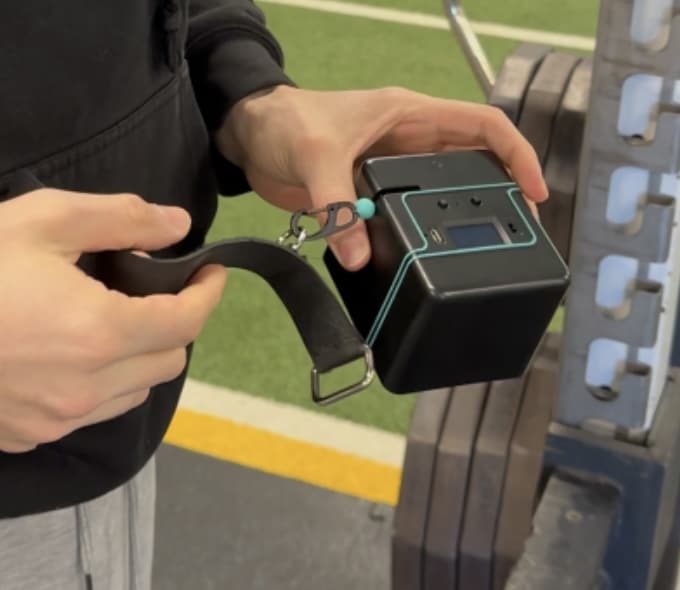
Once that is done, you want to turn your encoder on via the switch on the encoder and make sure that your bluetooth is set up on your phone or tablet. From there, you will go back into your app and connect your tablet or phone to the encoder you are using.
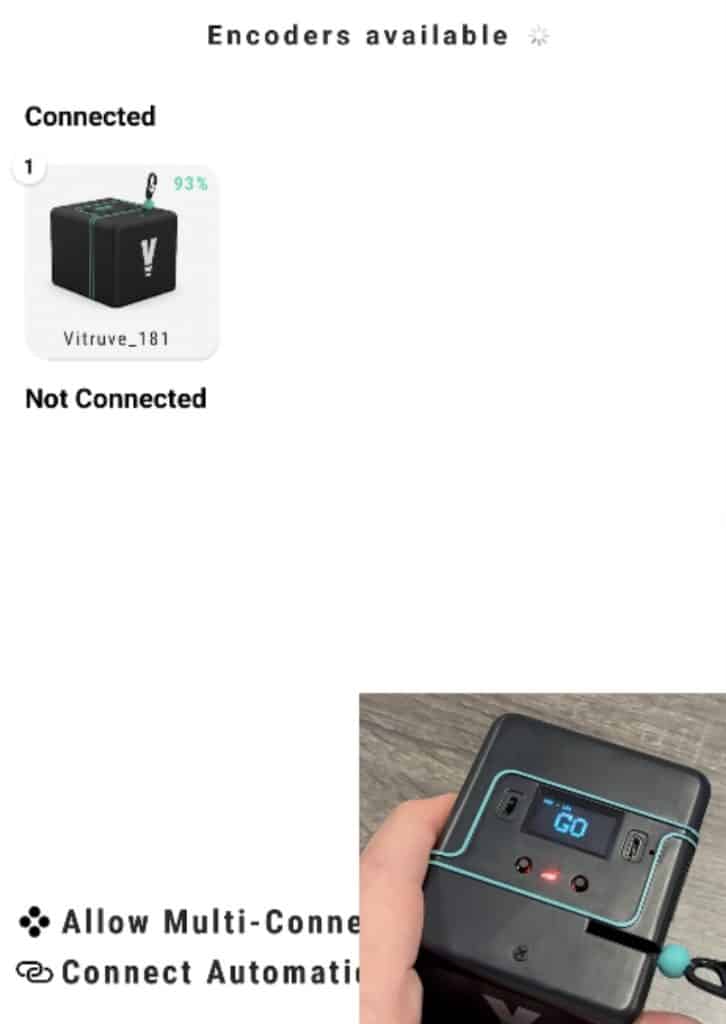
Before the encoder is connected, the encoder that you have turned on will show up under “not connected.”
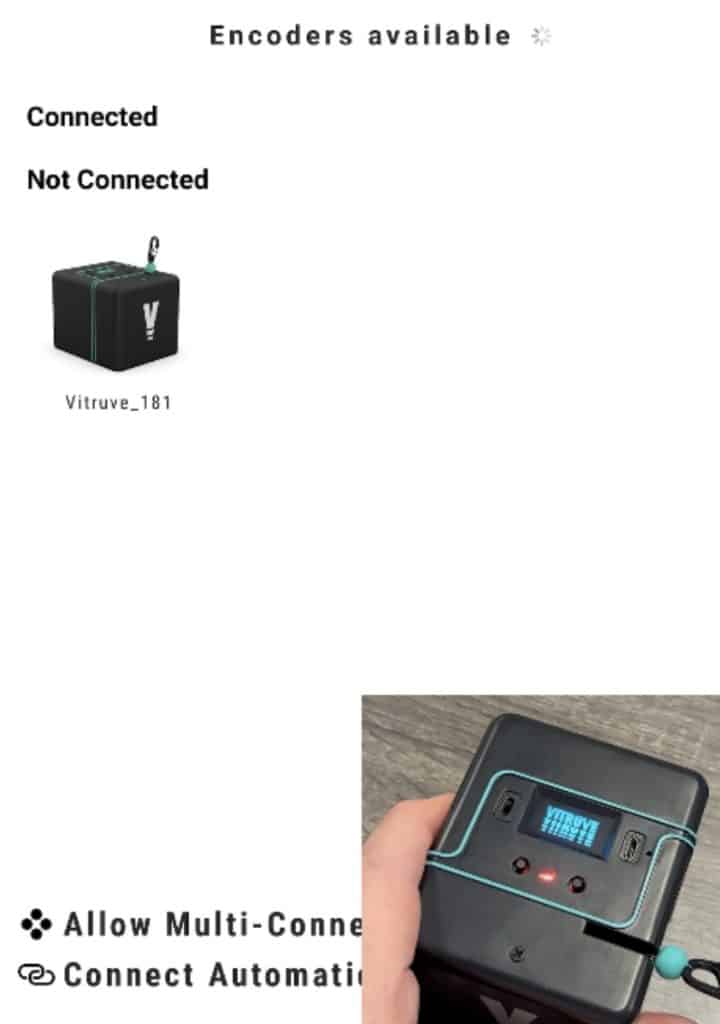
Once you click the encoder icon on the page, it should connect and move the encoder under the “connected,” category.
You are now set-up to attach your encoder to your barbell and get ready to go!
Properly Lining-up Your Encoder (Essential)
Properly lining-up your encoder is critical to ensure that it works properly and ALSO does not disrupt your bar path.
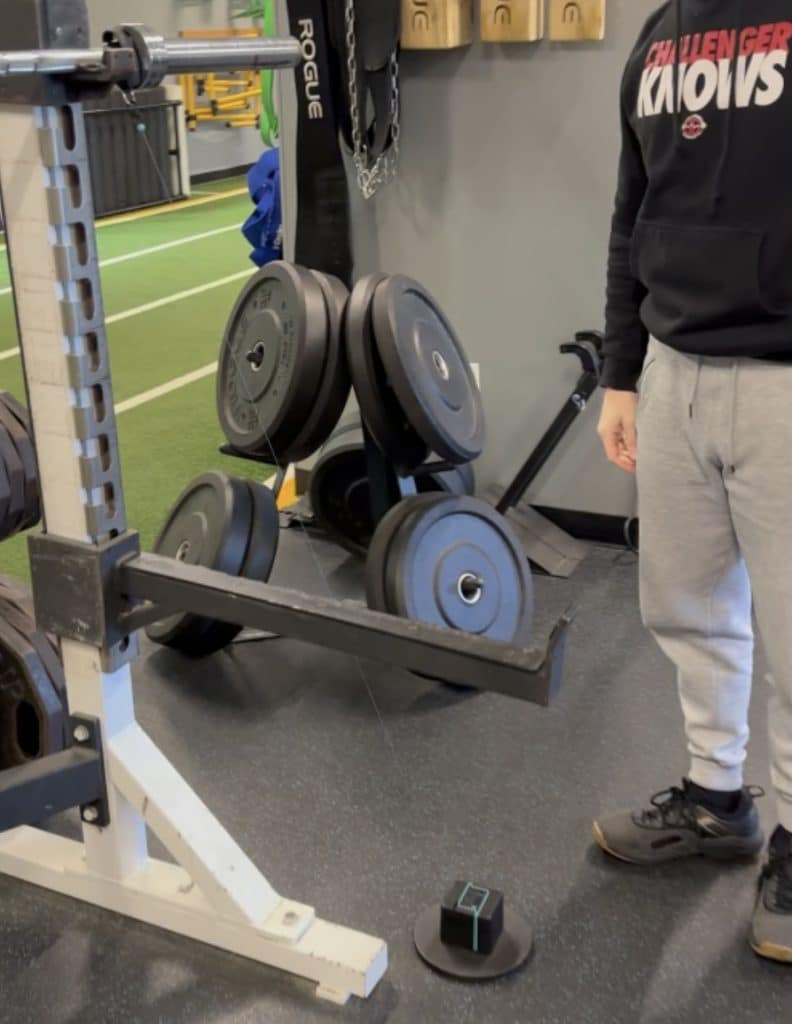
You will place your encoder with a small five pound weight plate. It will attach via the magnets on the bottom of the encoder. It is key to place the weight and encoder out from the barbell on the rack. Why? You want the encoder to be directly UNDER the bar where you would have the bar for the lift itself.
Remember, the bar moves OUT FROM the rack when squatting or benching, for example, and you want the encoder under the bar.
Reminder: The encoder should be attached to the bar via the strap that you attached to the encoder earlier. We like to place the strap on the inside of the barbell as you can see below.
Here is an example of what this would look like (floor and strap placement):
Using The Encoder and App for Rep-by-Rep Feedback
You now have created your profile, connected your encoder to bluetooth and to your tablet and set up your encoder properly with your bar to be ready for use.
It is now time to utilize your encoder with your lifts and gather data! This is where the encoder can work for us and determine bar speed for lifts, give us insight on peak or mean power, estimate our one rep max and tell us the distance of our total range of motion in each lift!
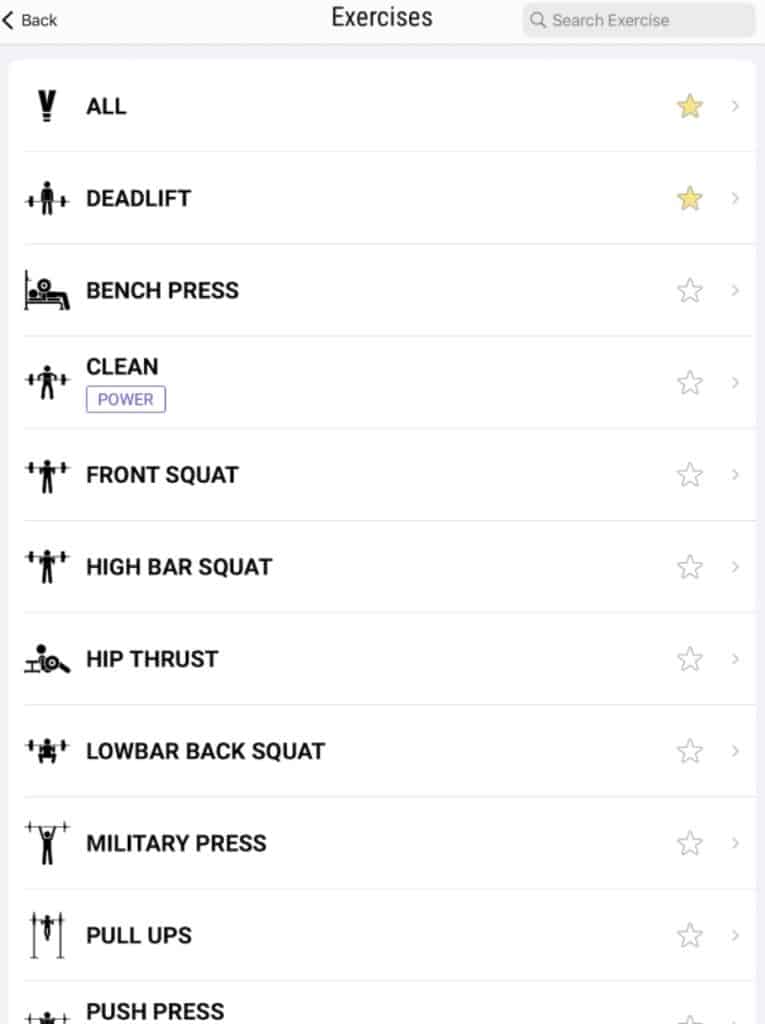
After you select the athlete profile for whomever is performing the lifts, you will select the type of lift being performed and enter the amount of weight being used for the lift.
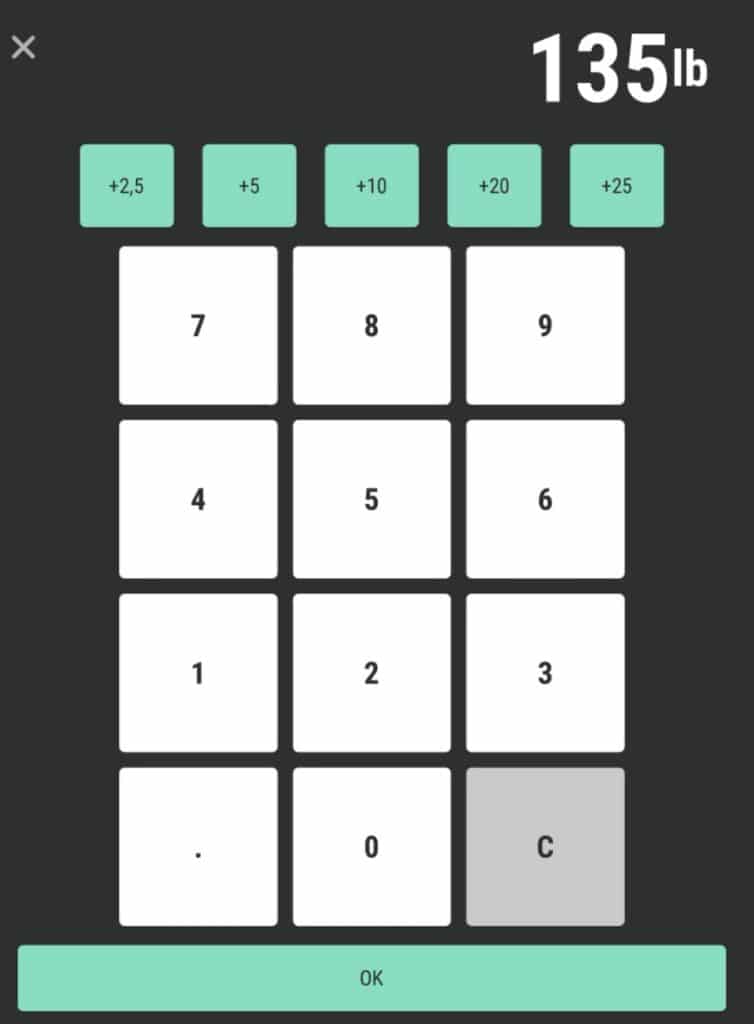
You will then hit “ok,” and see the screen below that will begin to gather the data of each lift you perform!
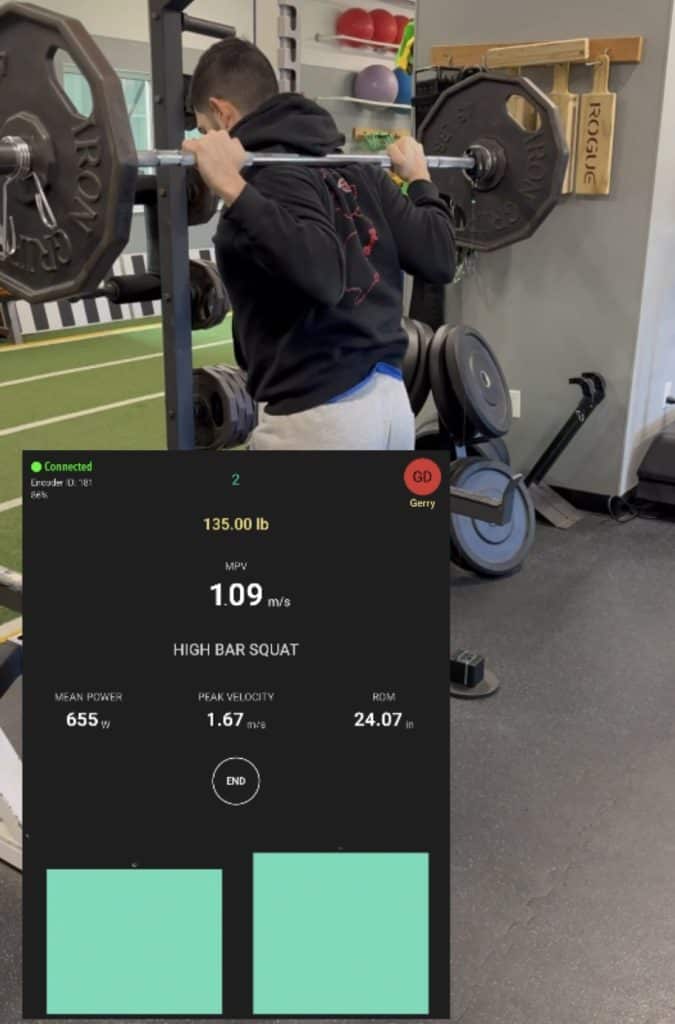
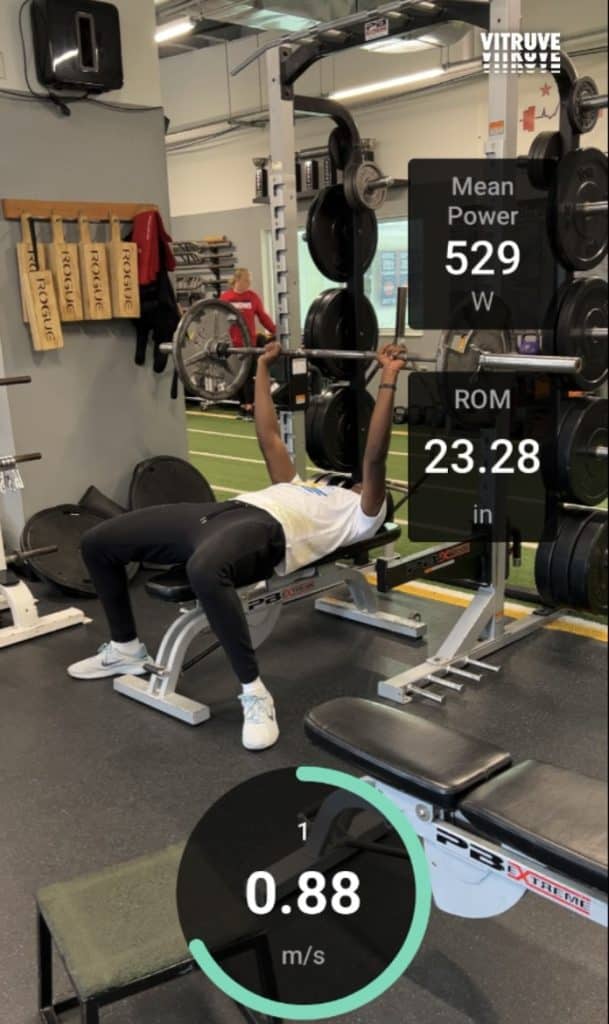
You will see here (second photo) that the app allows you to video sets WITHIN the app and have data appear in videos you can save and have later on!
After you complete your set, you will see the data from the entire set (every rep). You can see how you performed and look at numbers in more detail.

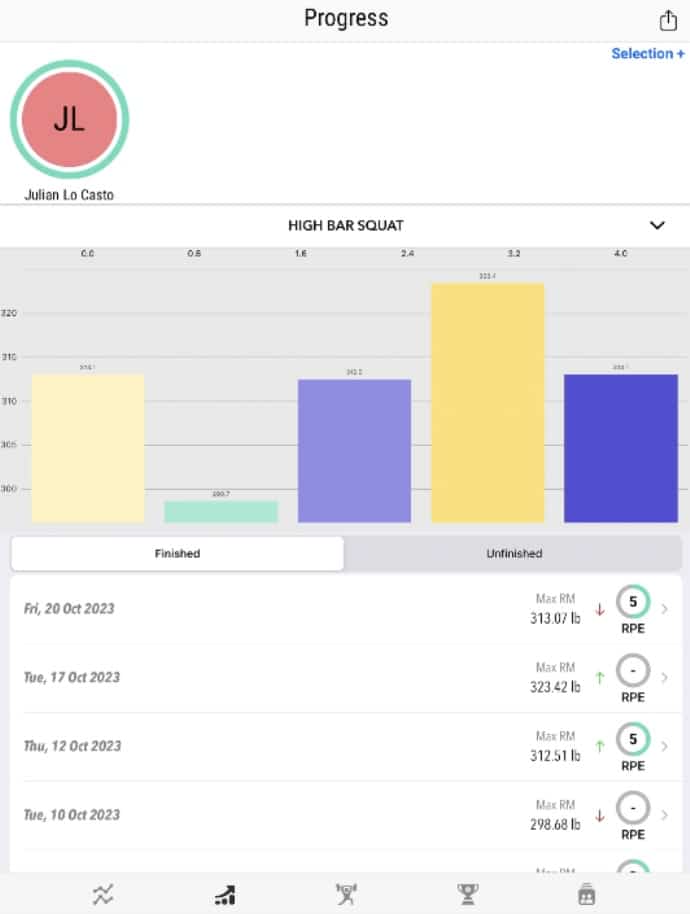
Accessing Current and Prior Training Data to Enhance Training
The last part of this process will involve ensuring you fully utilize the historical data the Virtuve system gathers for you so you can keep track of prior performance, use it to change or progress training and determine overall progress.
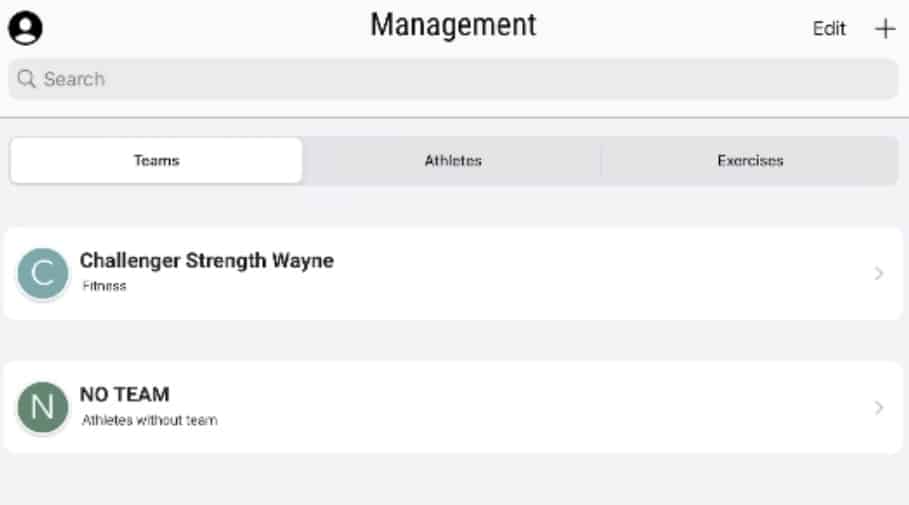
A big part of this organizational process that I do not want to miss is the ability to organize athletes into various “teams.” You can create teams to represent teams that train at the facility, different facilities or even group athletes by sport!
Lastly, once all of this is done you can access every profile and the previous training history to utilize however you see fit!
You now have an understanding on how to set up and use your Vitruve system effectively!